> For the complete documentation index, see [llms.txt](https://support.hivo.co/llms.txt). Markdown versions of documentation pages are available by appending `.md` to page URLs; this page is available as [Markdown](https://support.hivo.co/collections/remove-asset-s-from-collection-s.md).
# Remove Asset(s) from Collection(s)
Manage asset placement flexibly, allowing you to simultaneously remove assets from old collections and place them into new collections
This feature allows you to flexibly manage your asset locations, enabling you to simultaneously remove assets from old collections and organize them. Whether you are in the Library or Collections view, the process remains the same.
⚠️ **User Right Required**: **Can Edit Collection Contents** and **Can Share Collections** - User can **add asset to or remove asset from Collections**, if they have "Share" permission on both the Collections and the Assets.
#### 🔹 Step 1: Select Assets
* Access your library or Collections
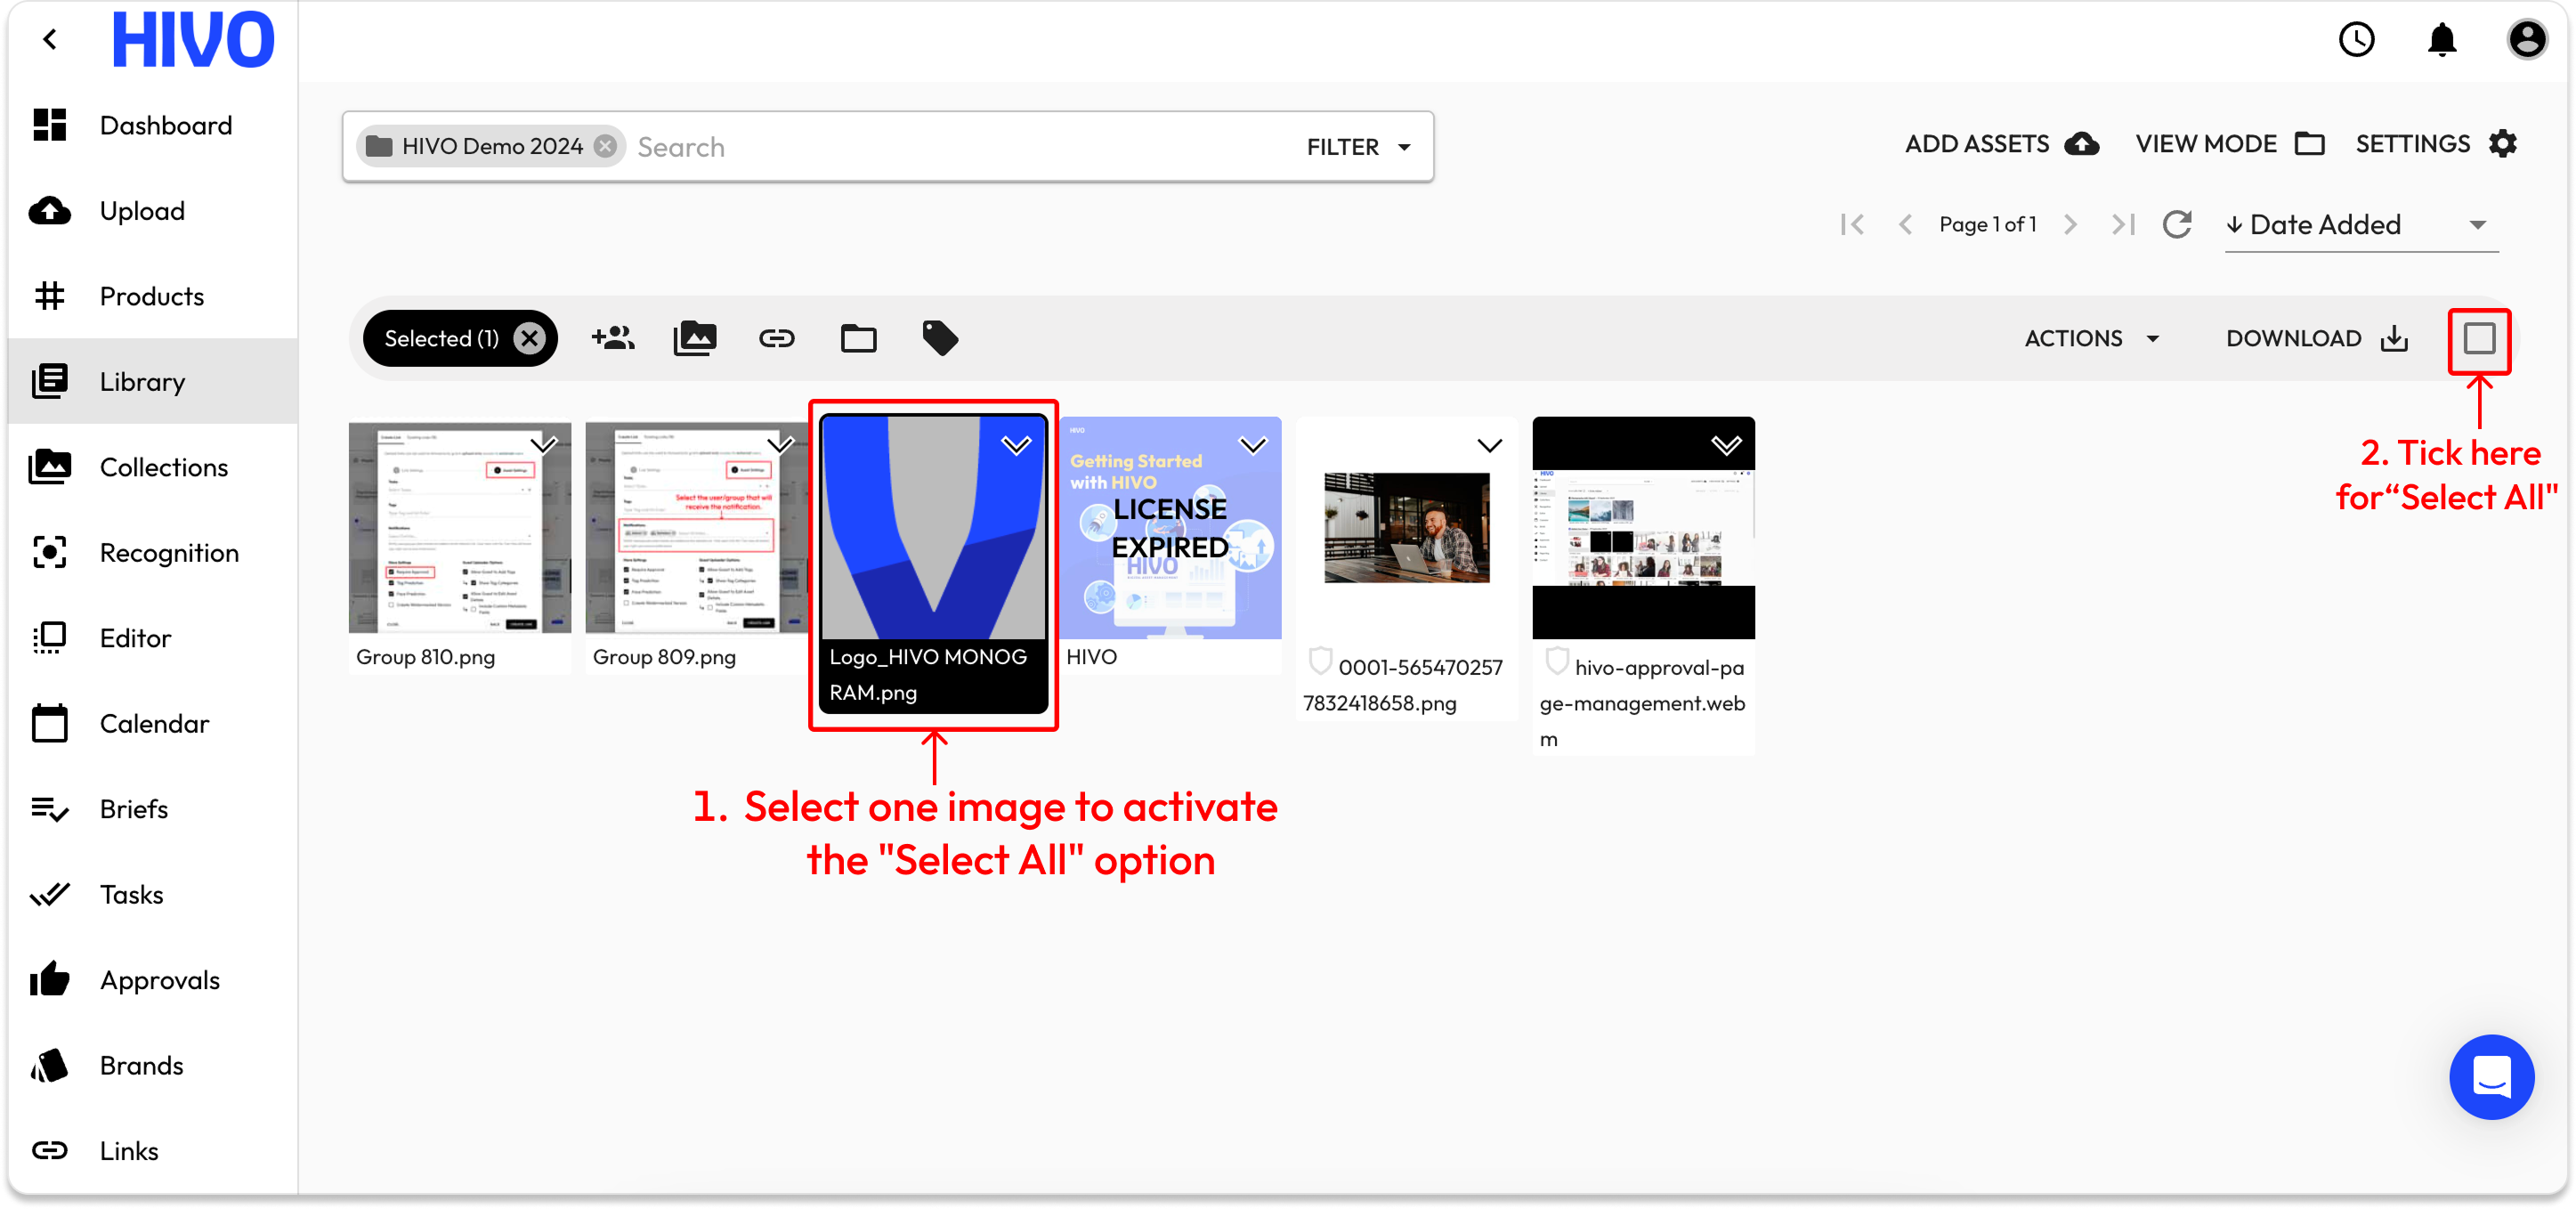
* Select one or multiple assets by ticking the checkbox at the corner of each asset.
* To select all visible assets, use the **“Select All”** in the right corner of the screen, next to the Download option.
#### 🔹 Step 2: Open the Edit Collections dialog
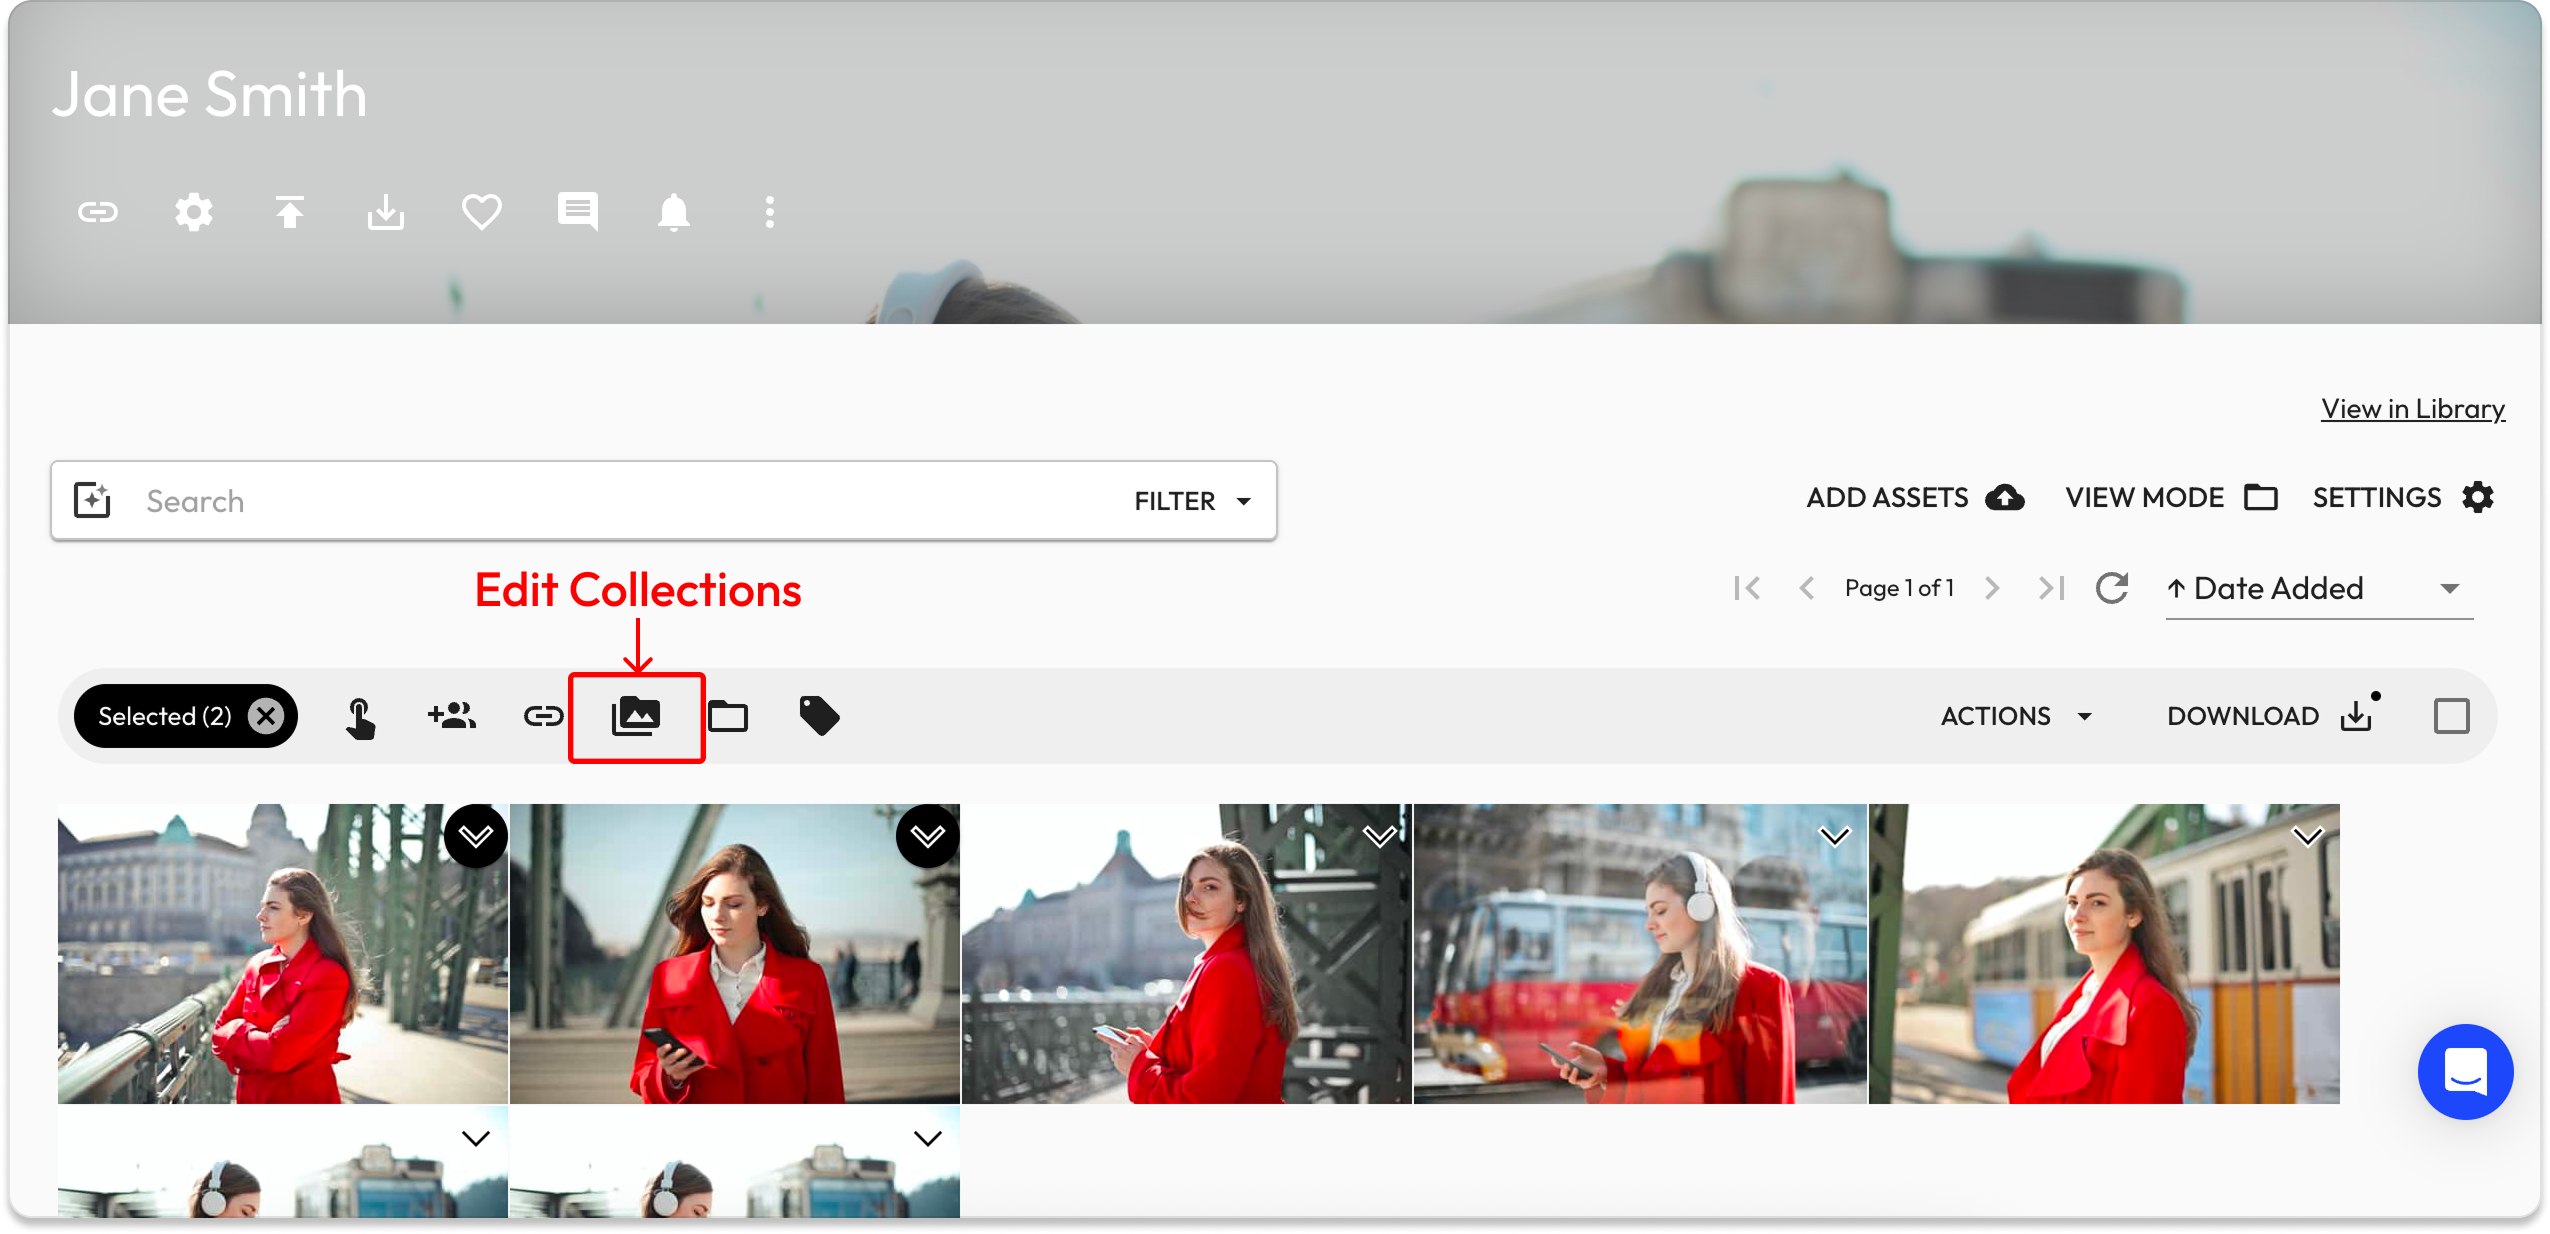
* Once selected, the **Selection Toolbar** will appear, click the **"Edit collection"** icon
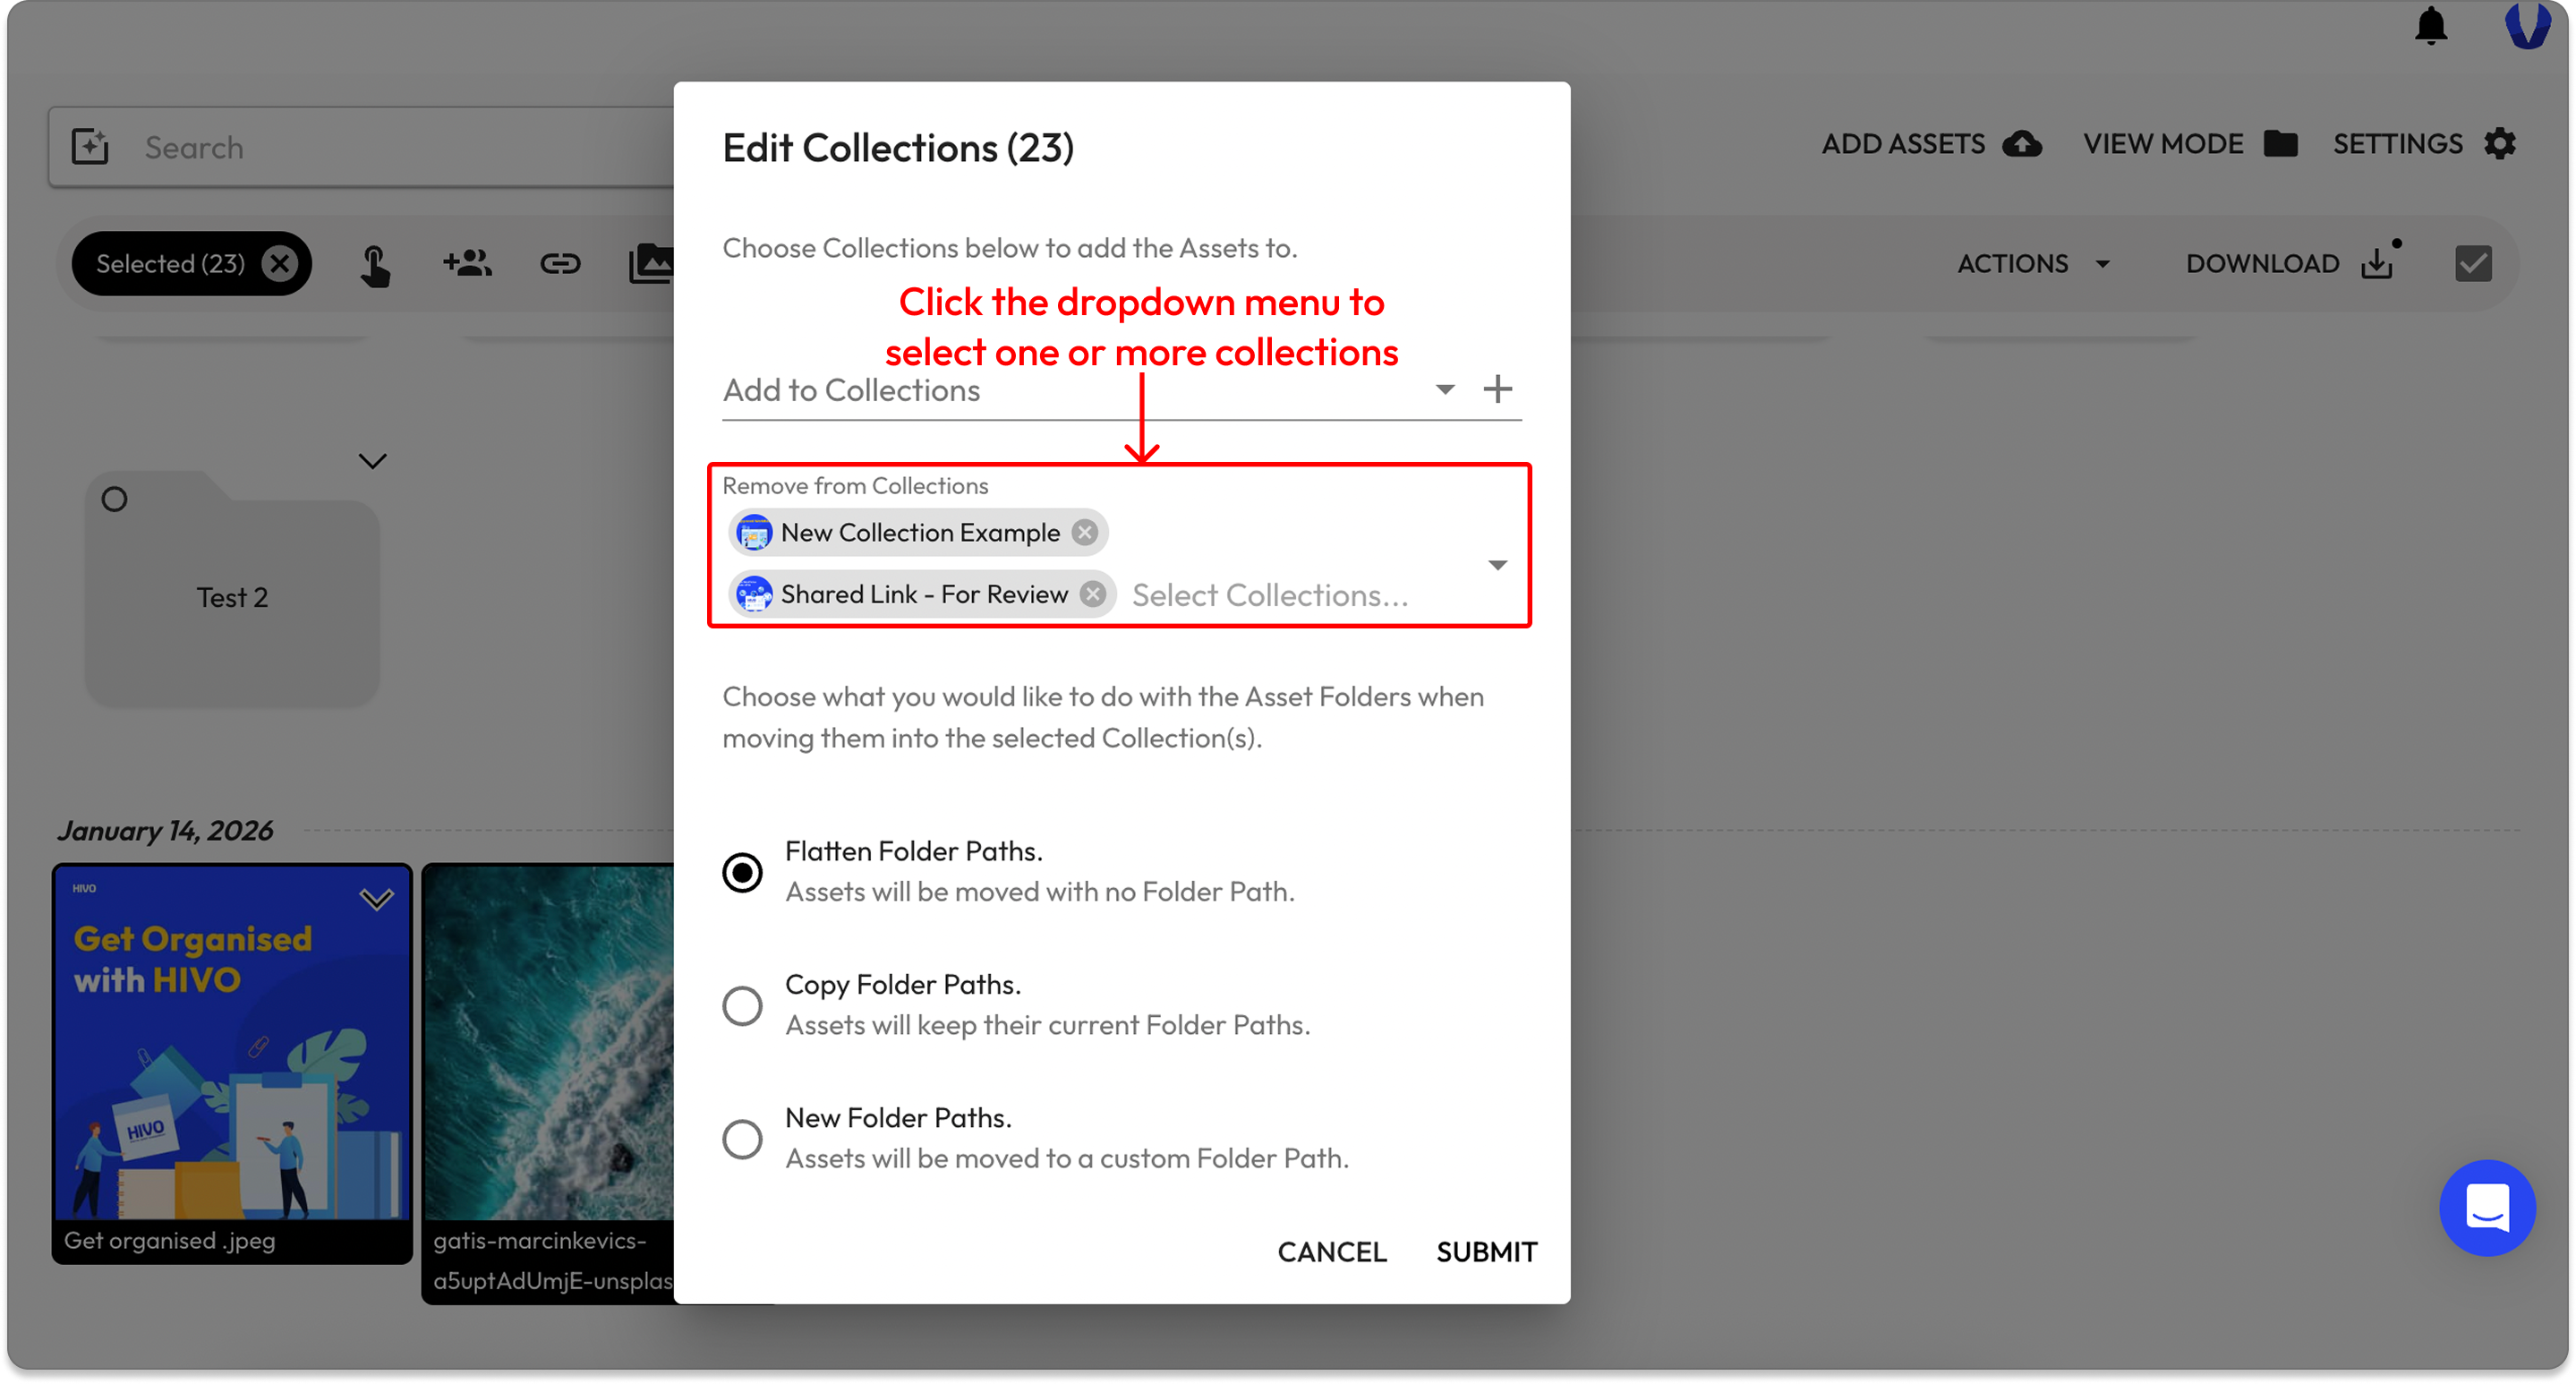
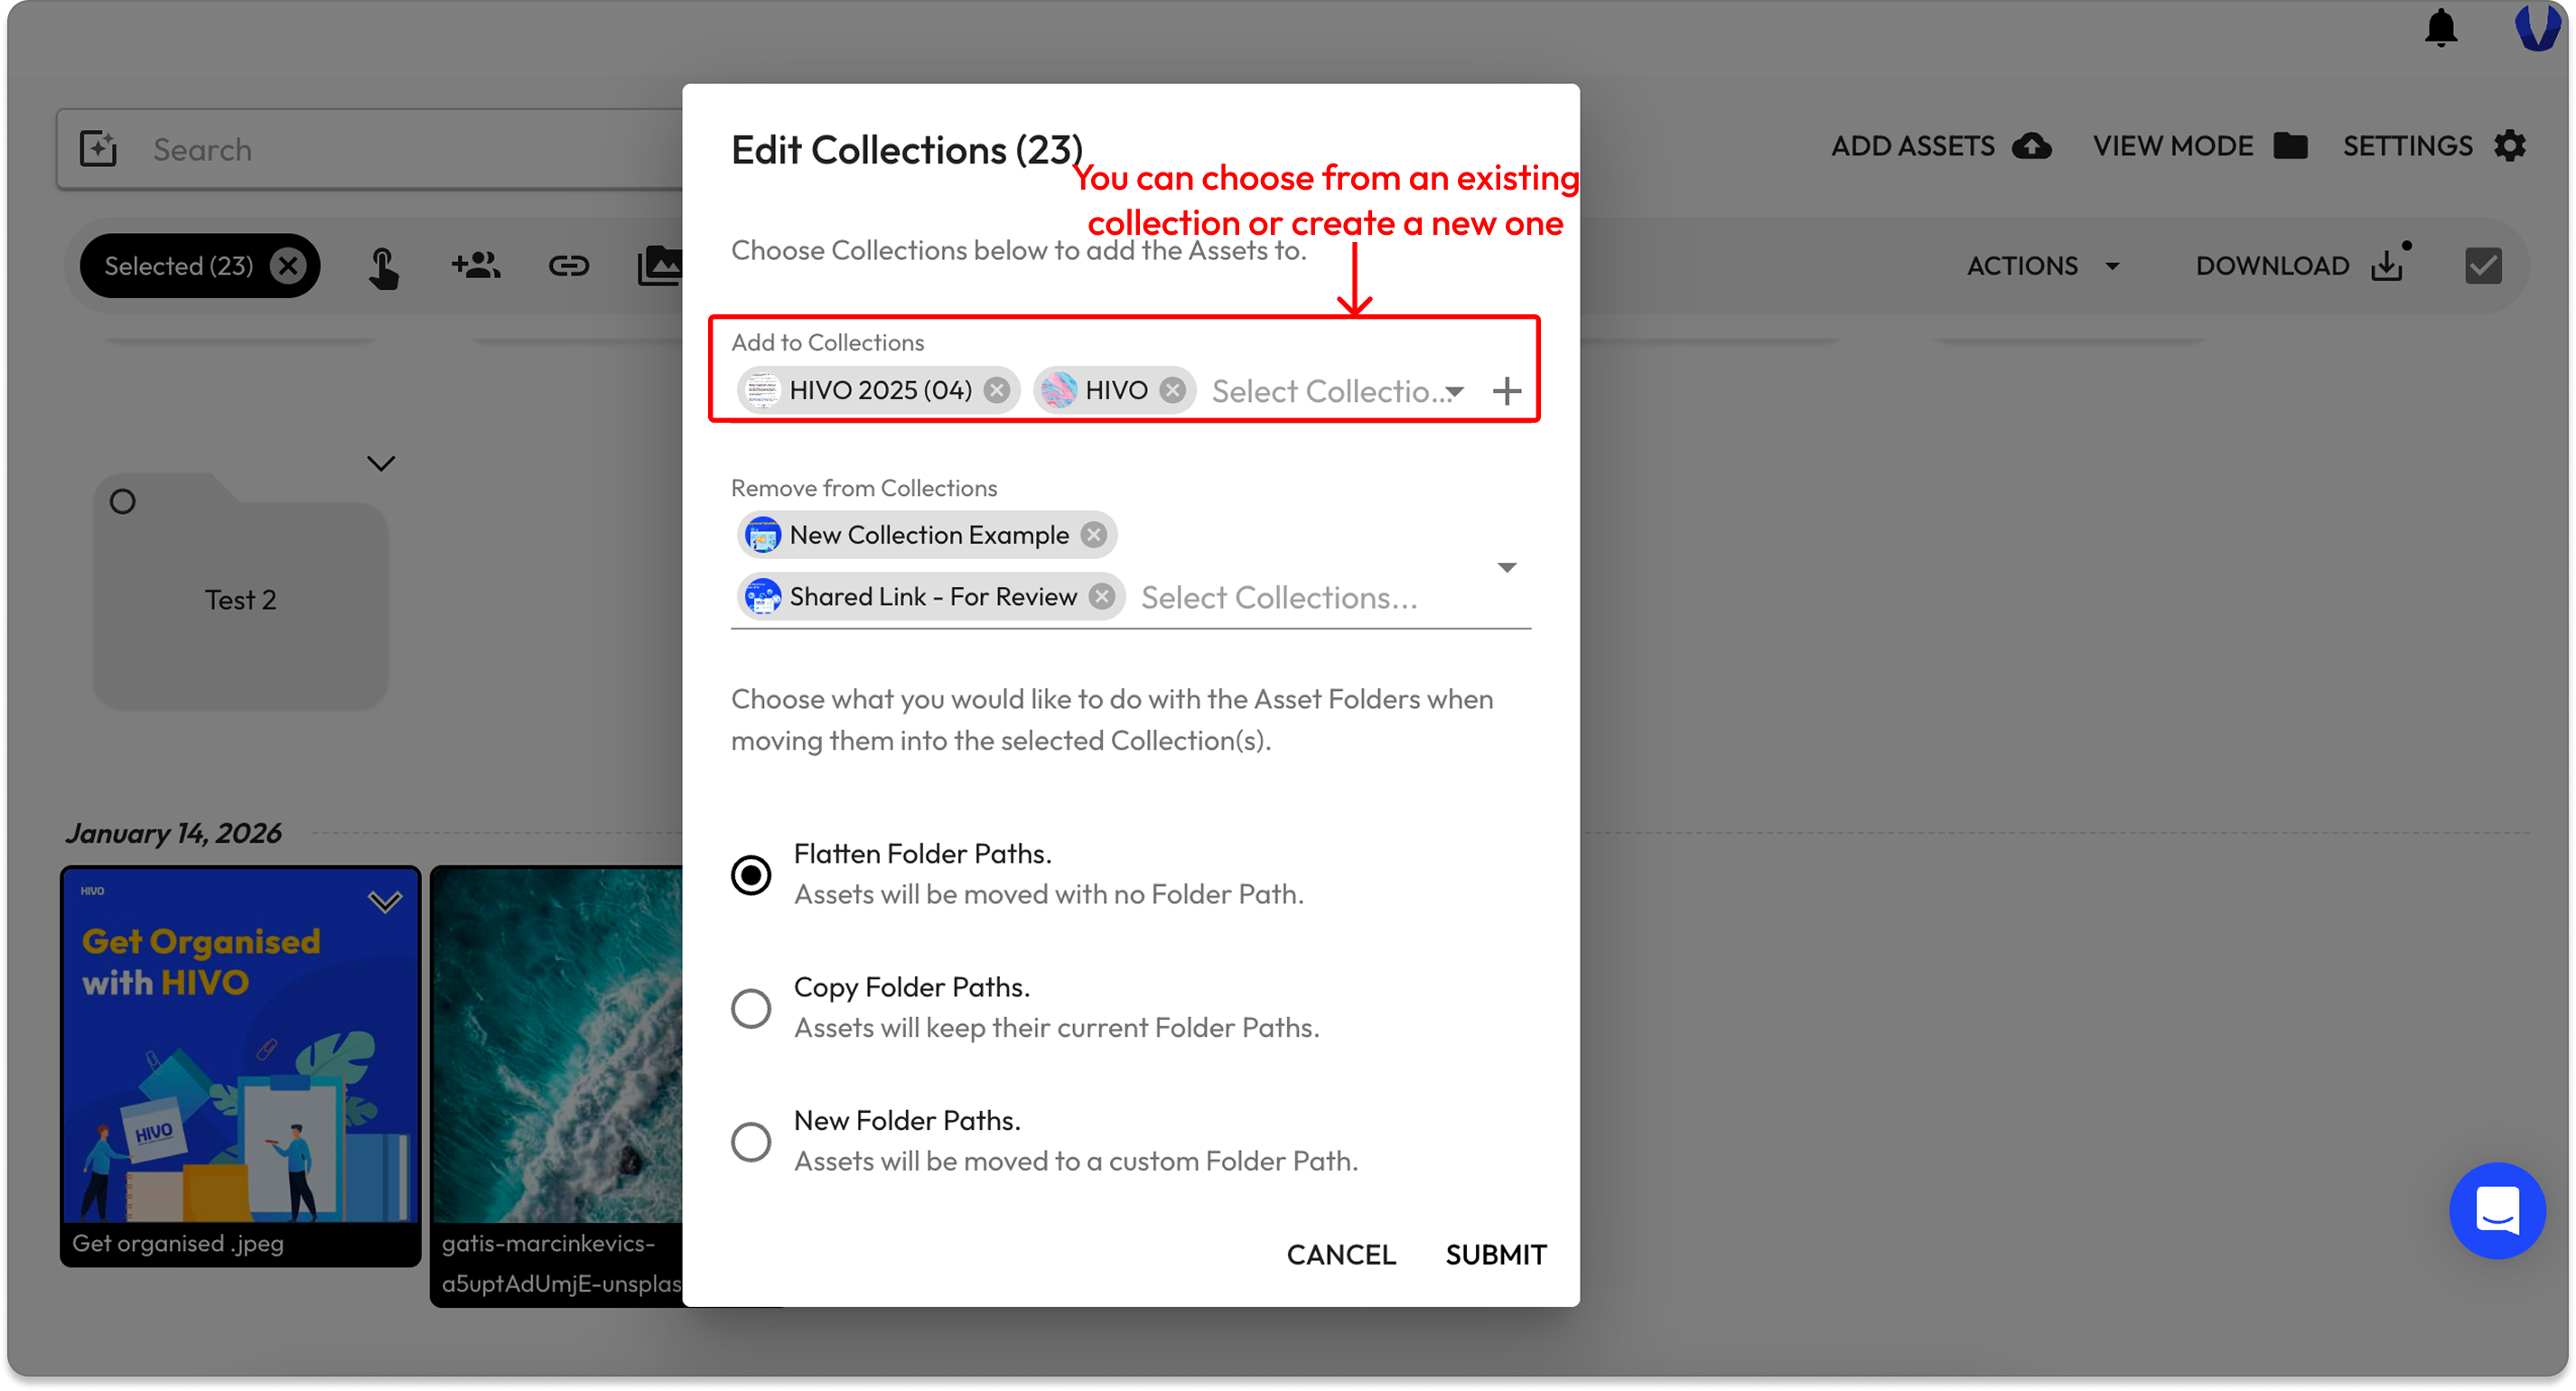
* The Edit Collections (n) dialog will appear (where *n* represents the number of assets being edited).
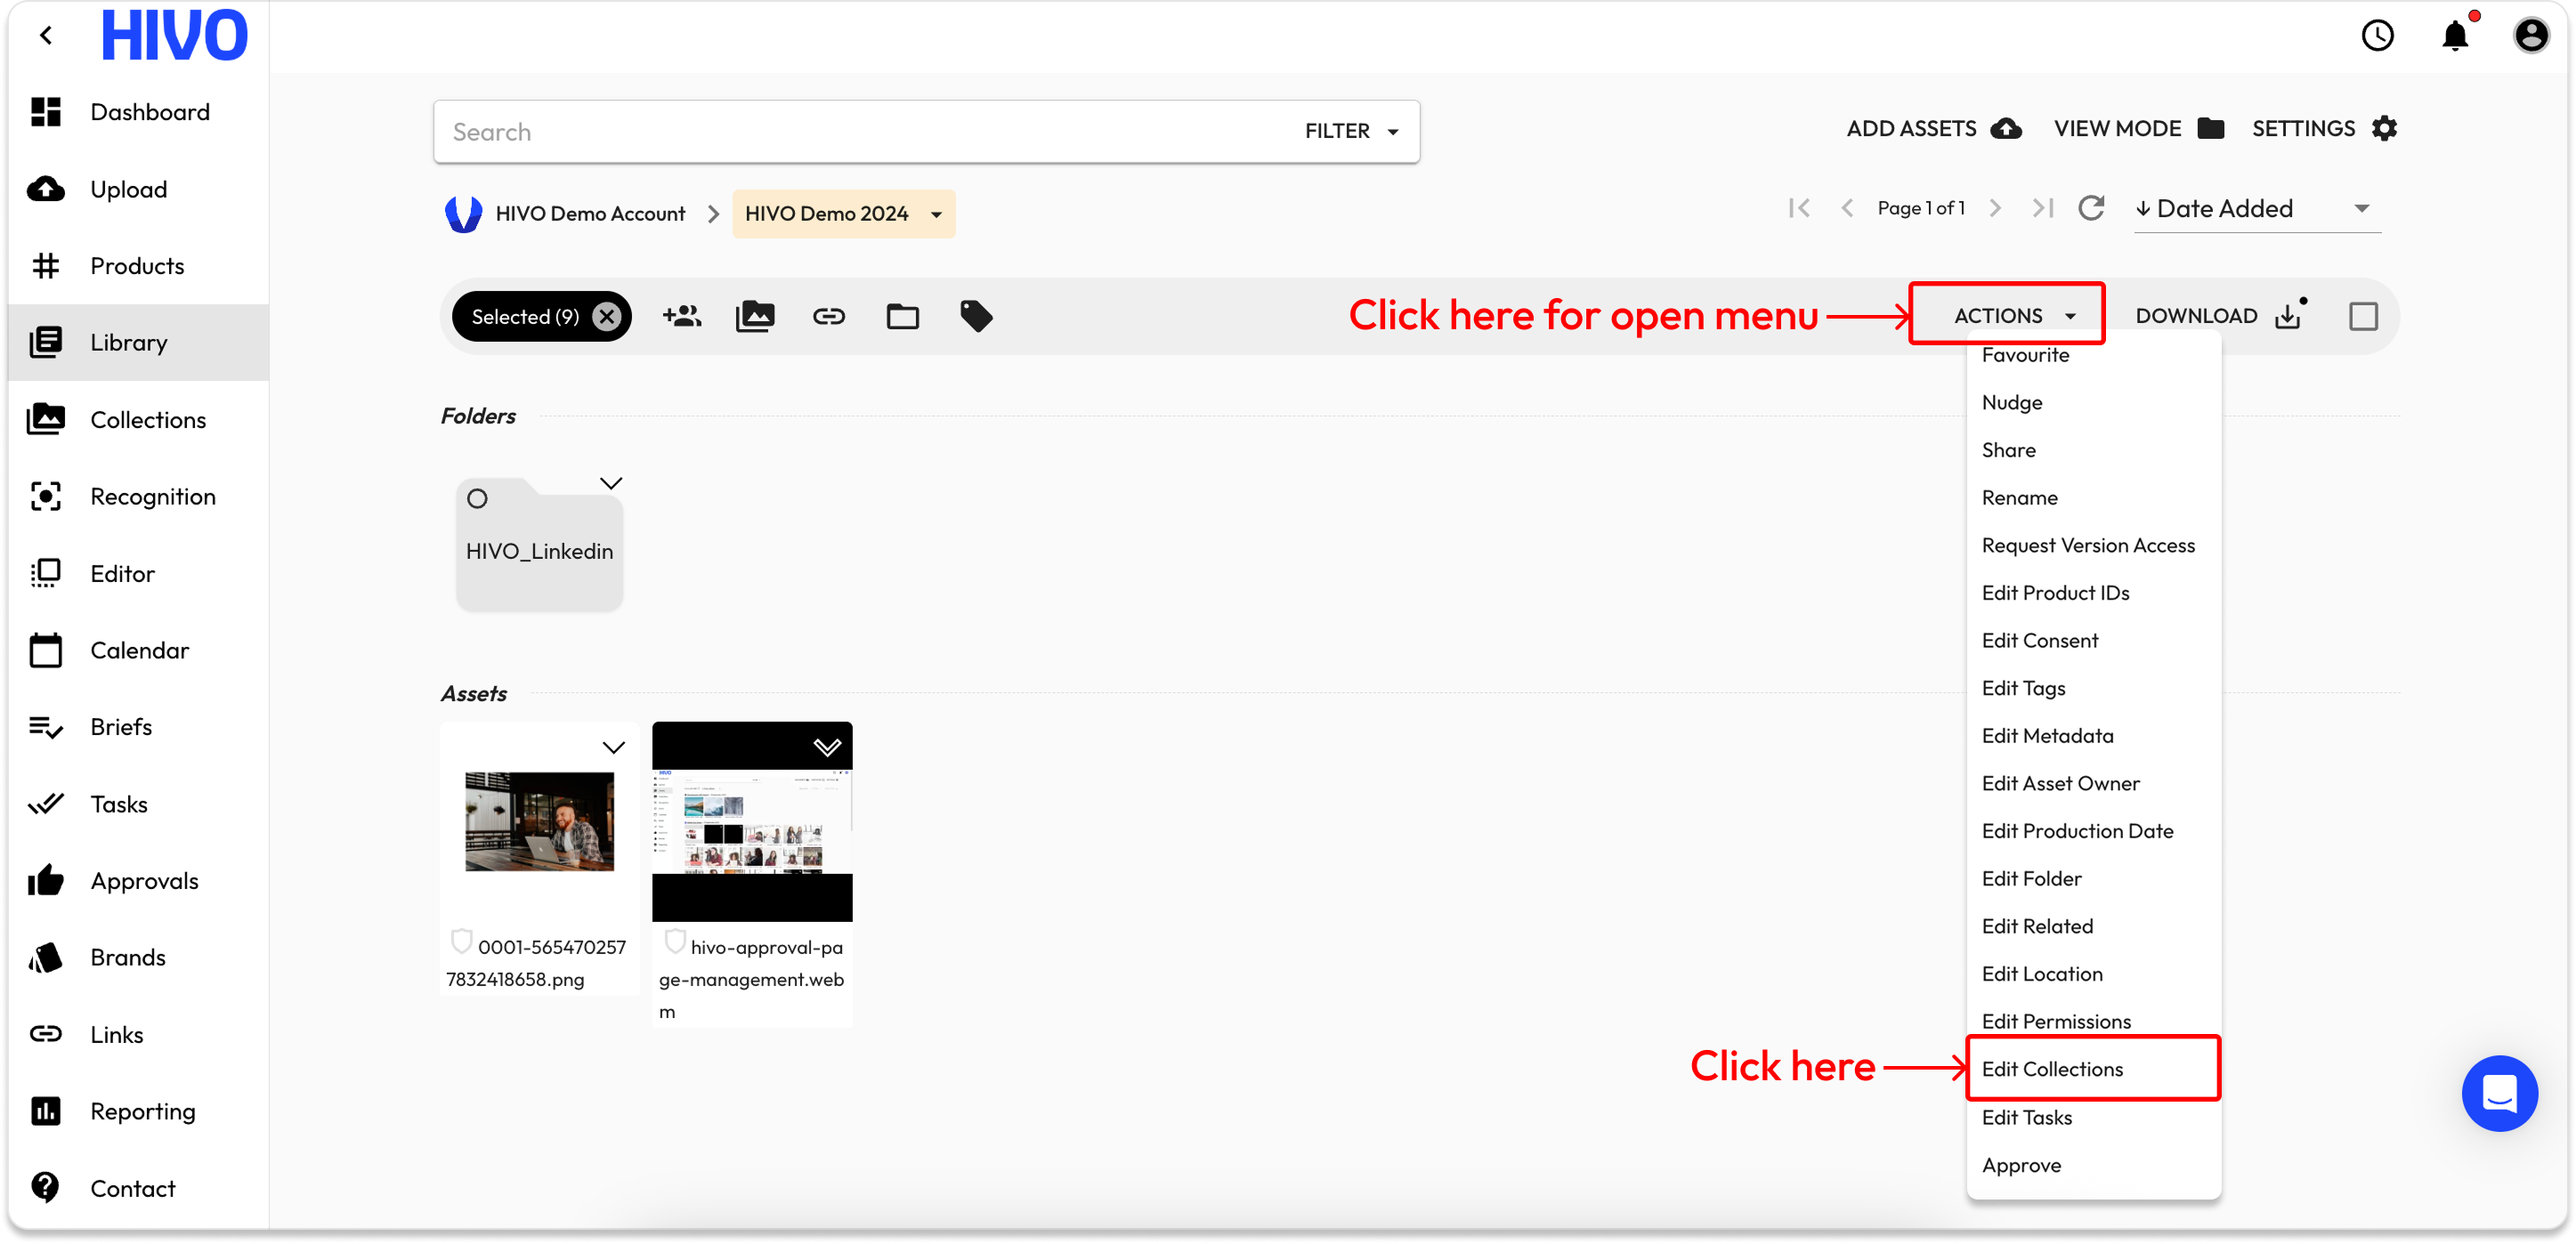
👉 Anothers way to do it: Click **Action Menu ->** Choose **“Edit Collection”** from the dropdown menu.
#### 🔹 Step 3: Configure Removal
In this interface, you can perform two actions concurrently:
* **Remove from Collections**: Click the dropdown menu to select one or more collections you want to remove these assets from.
* **(Optional) Add to Collections**: If you want to move these assets to a new location immediately, you can select additional collections in this field.
* Choose from an existing collection you want to **add** the assets.
* If you have permission, you can also **create a new Collection** from within this dialog.
#### 🔹 Step 4: Customize Folder Paths
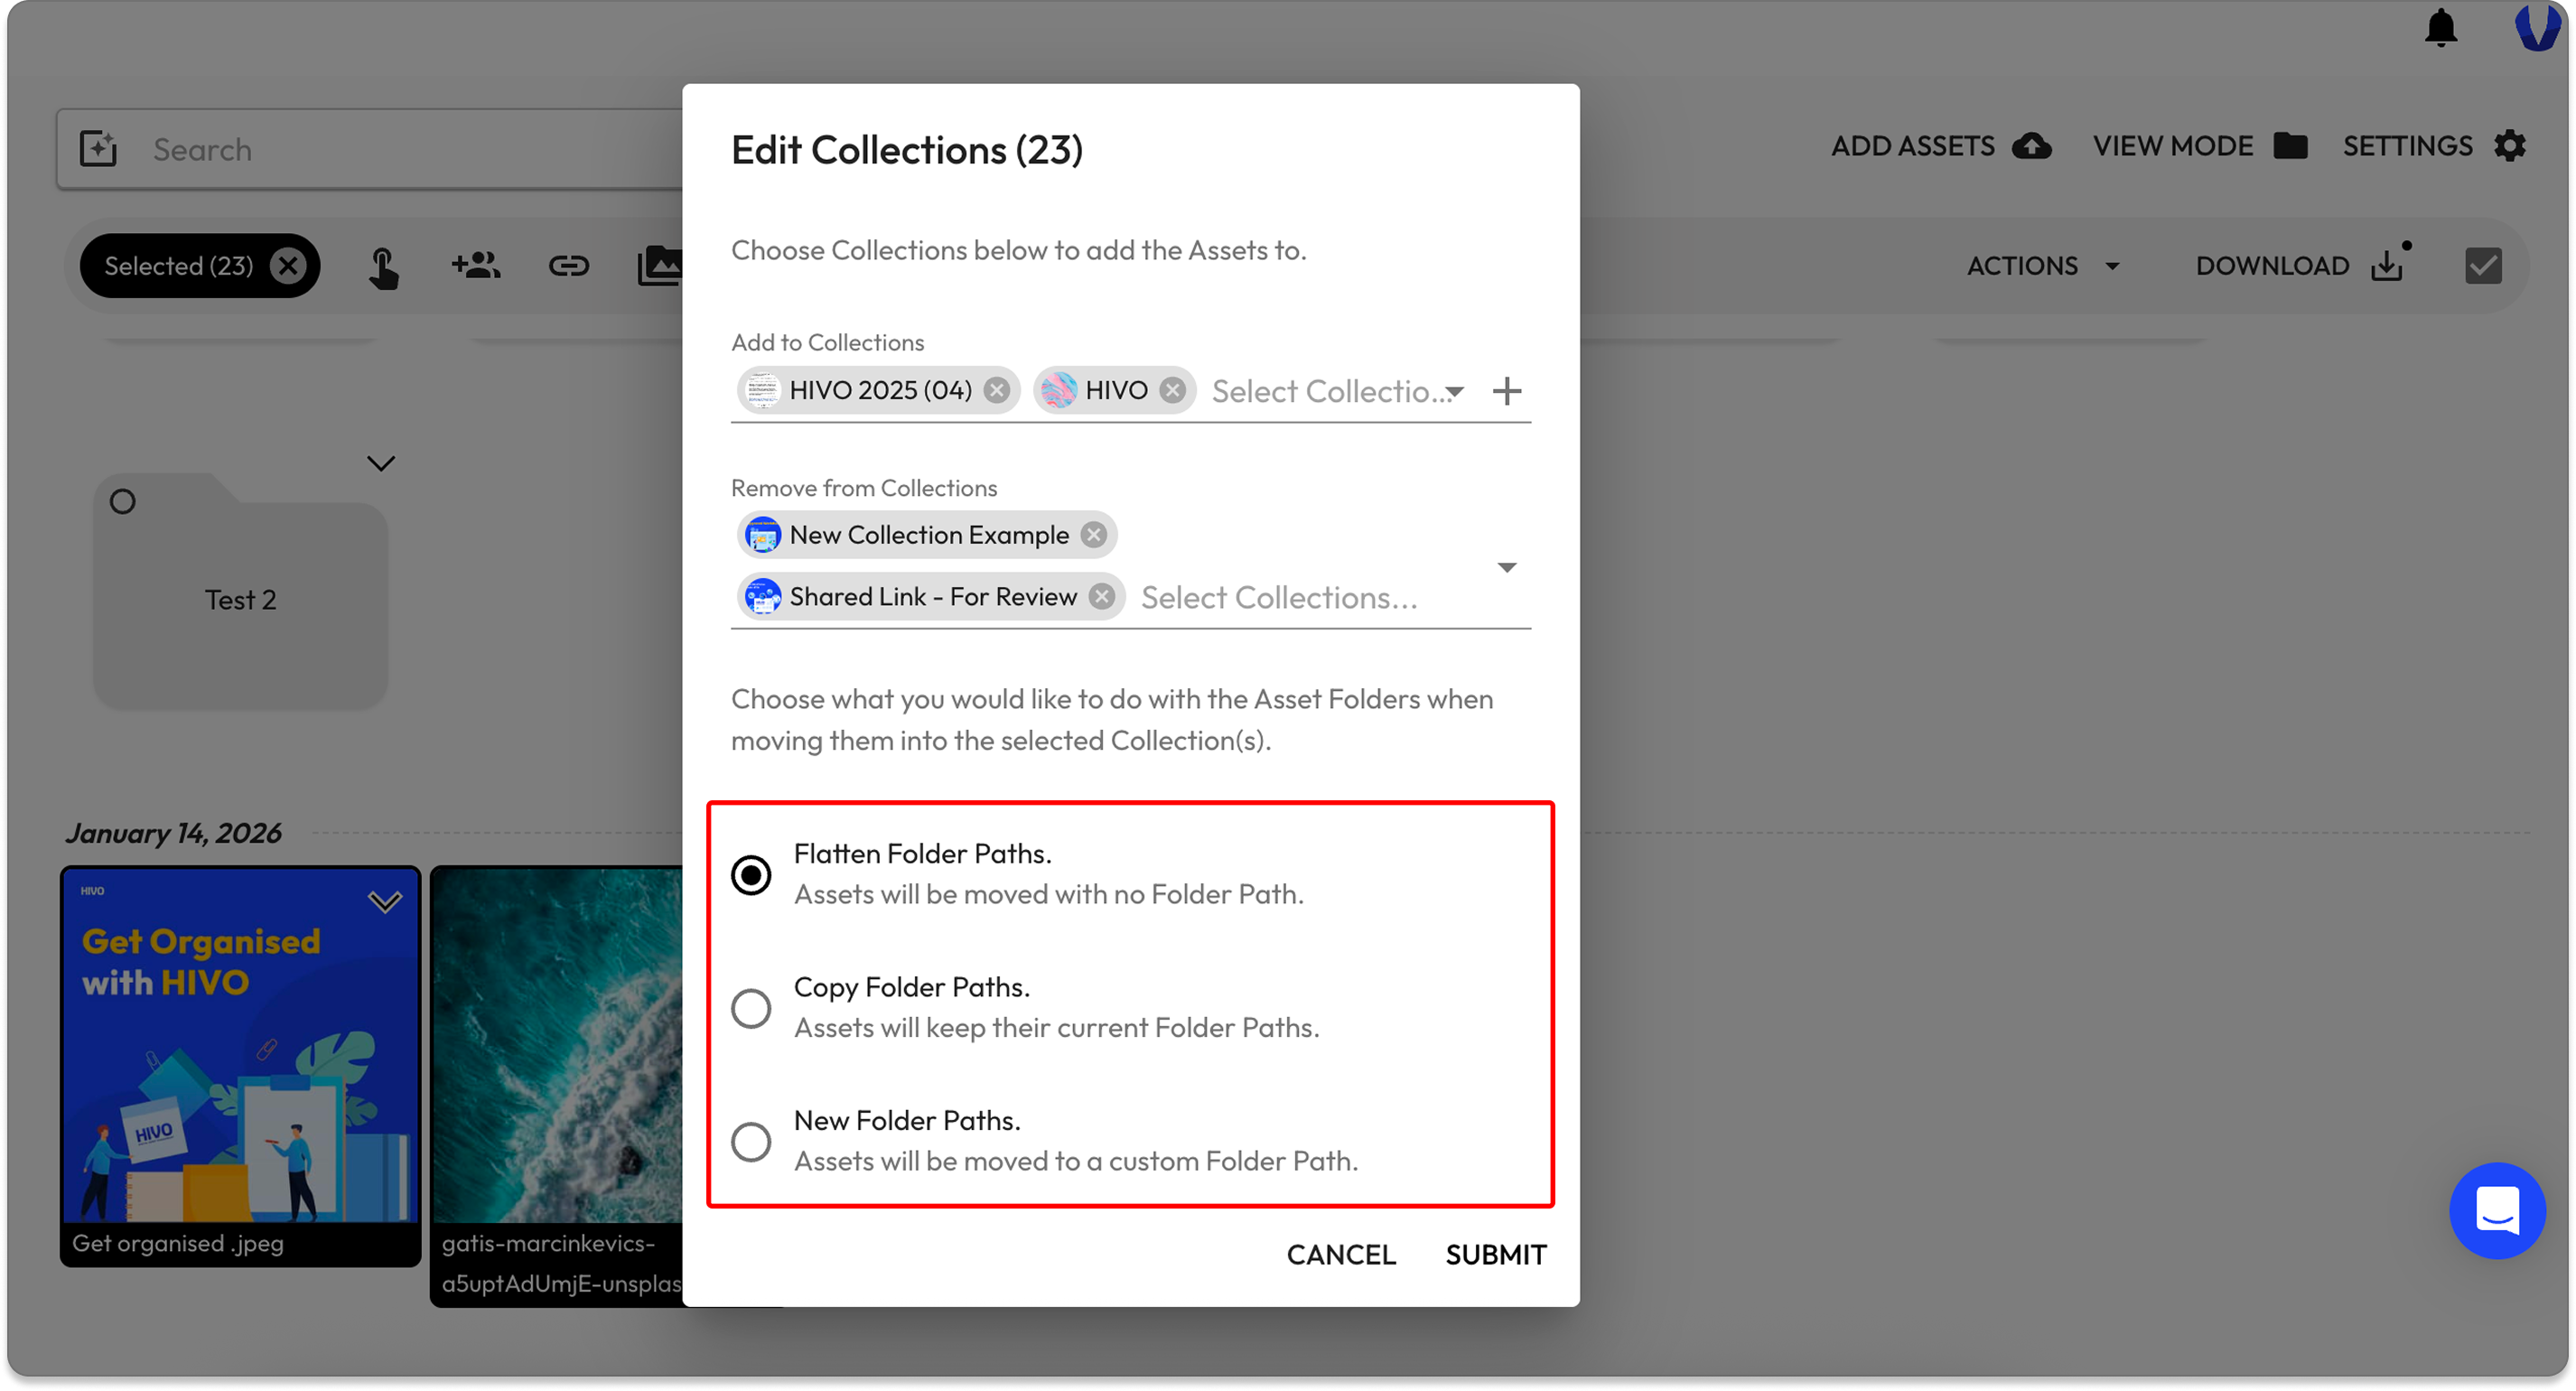
Before finishing, choose how the system should handle the asset folder structure during the move:
* **Flatten Folder Paths:** Removes all existing folder structures. Assets will be moved to the destination collection without any subfolders.
* **Copy Folder Paths:** Retains the current folder structure when moving to the new collection.
* **New Folder Paths:** Moves assets to a custom folder path that you define.
Then, click **“Submit”** to confirm and update the asset Collection assignments.
If you have any questions, don't hesitate to ask, we're always here to help!
---
# Agent Instructions
This documentation is published with GitBook. GitBook is the documentation platform designed so that both humans and AI agents can read, navigate, and reason over technical content effectively. Learn more at gitbook.com.
## Querying This Documentation
If you need additional information that is not directly available in this page, you can query the documentation dynamically by asking a question.
Perform an HTTP GET request on the current page URL with the `ask` query parameter, and the optional `goal` query parameter:
```
GET https://support.hivo.co/collections/remove-asset-s-from-collection-s.md?ask=&goal=
```
`ask` is the immediate question: it should be specific, self-contained, and written in natural language.
`goal` is optional and describes the broader end goal you are ultimately trying to accomplish on behalf of the user. GitBook uses it to tailor the answer towards what is most useful for that goal.
The response will contain a direct answer to the question and relevant excerpts and sources from the documentation.
Use this mechanism when the answer is not explicitly present in the current page, you need clarification or additional context, or you want to retrieve related documentation sections.